How to enable GPU acceleration for PixInsight
Certain processes in PixInsight, like StarNet2 and the RC-Astro XTerminator tools, benefit massively from running on the GPU. Typically they take minutes to finish when using the CPU, but with a CUDA capable GPU they'll be done in less than 30s.
This tutorial was inspired by the guide made by darkarchon, and updated to support newer GPUs. To keep things simple, the guide covers the necessary files and steps to make PixInsight use the GPU, and nothing more.
The software used here should work on most Nvidia GPUs from the last ten years or so; from the GTX 900-series up to the RTX 40-series. Later ones, like the RTX 50-series, will not work.
Getting started
- Before proceeding, open the following link, and make sure that your GPU has Compute Capability 3.5 or higher. https://developer.nvidia.com/cuda-gpus
- Use the 64-bit version of Windows 10 or Windows 11
- Update the GPU drivers; the software used here requires driver version 452.39 or higher.
- Log in to your developer account on the NVIDIA website. If you don't have one, create one for free.
- Download the following 4 files:
- If you have previously installed CUDA, uninstall it if you don't have other uses for it
Setting up
1. Replace tensorflow
- Go to 'C:\Program Files\PixInsight\bin'
- Rename tensorflow.dll to tensorflow-old.dll in case you want to use it later and don't want to re-install
- Open libtensorflow-gpu-windows-x86_64-2.9.0.zip
- Extract tensorflow.dll from 'lib' to 'C:\Program Files\PixInsight\bin'

- Run cuda_11.8.0_windows_network.exe
- Select 'Custom (Advanced)'

- Deselect everything, then select 'Libraries' in CUDA > Runtime
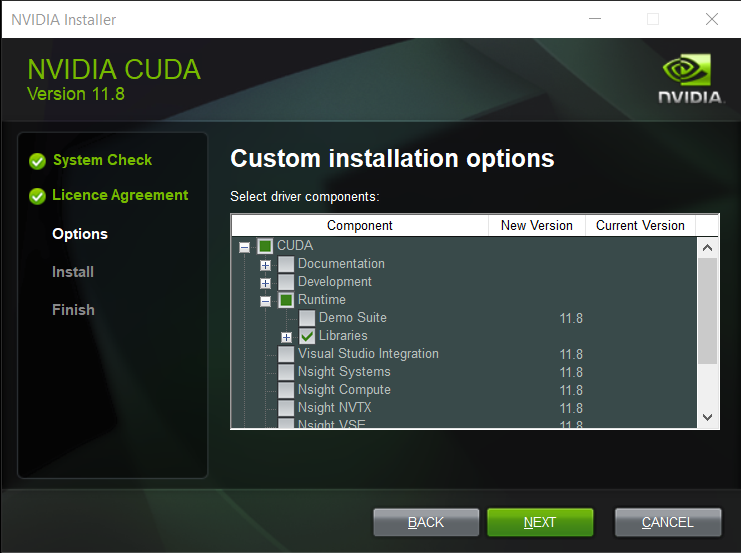
- Click next, and proceed with the install
3. Install cuDNN
- Open cudnn-windows-x86_64-8.7.0.84_cuda11-archive.zip
- Extract the contents of the folder 'bin' to 'C:\Program Files\NVIDIA GPU Computing Toolkit\CUDA\v11.8\bin'
- Overwrite existing files if you are updating from another version

4. Install zLib
- Open zlib123dllx64.zip
- Extract zlibwapi.dll from 'dll_x64' to 'C:\Program Files\NVIDIA GPU Computing Toolkit\CUDA\v11.8\bin'

5. Edit Environment Variables
- Open the start menu, search for 'environment', and click 'Edit the system environment variables'

- Click 'Environment Variables', then under 'System variables' click 'New' and enter "TF_FORCE_GPU_ALLOW_GROWTH" as name and "true" as value, then click 'OK'

- Select the variable called 'Path' under 'System variables', and click 'Edit'

- Click 'New', and add "C:\Program Files\NVIDIA GPU Computing Toolkit\CUDA\v11.8\bin"
- If you had previously installed a different version of the CUDA Toolkit, there might be a path pointing to that version as well; remove it if you don't need it, otherwise move it down below 11.8 on the list
- Click 'OK' to save and exit

6. Test
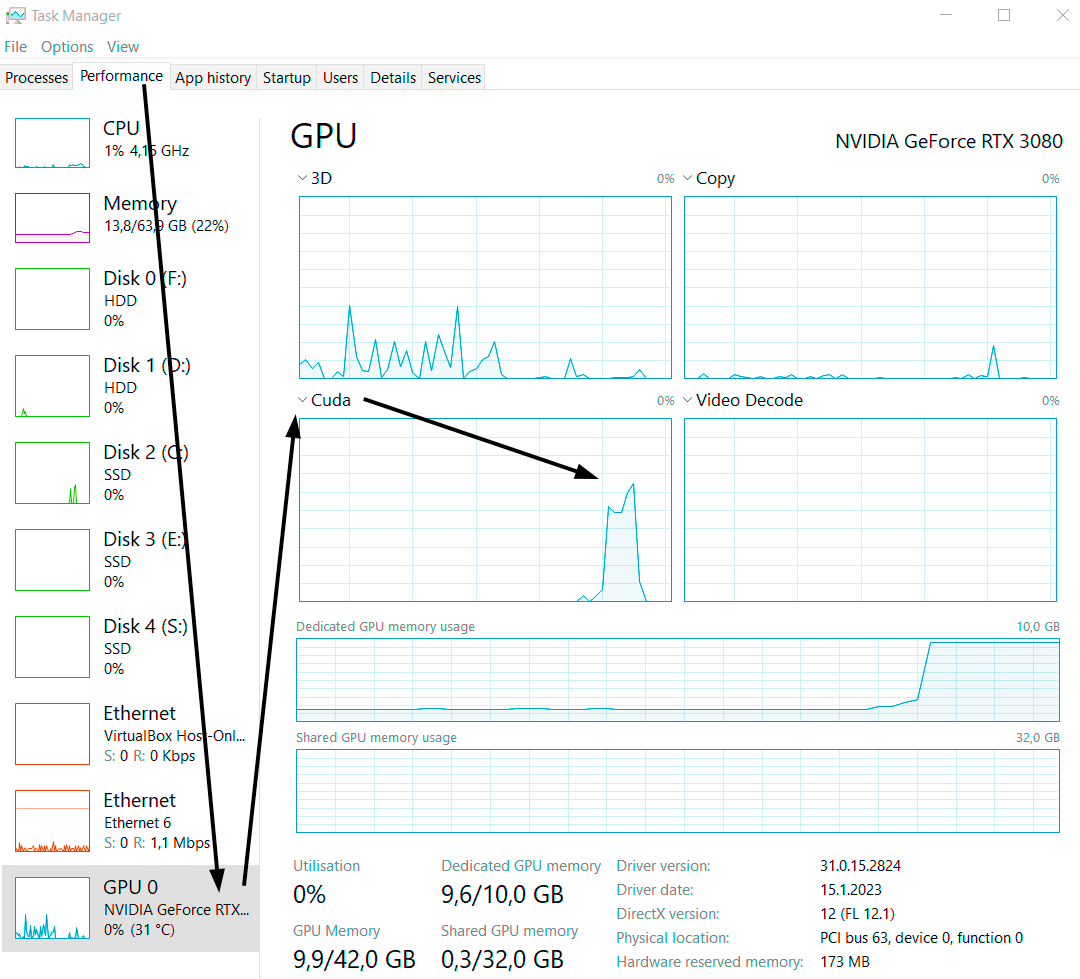
- Open an image in PixInsight, and run StarNet2 or any RC-Astro tool
- If it's a lot faster than before, you know it's working :)
- A successful install will also show up on the GPU performance monitor when processing; depending on your setup it can be either in the 3D graph or the Cuda graph

Troubleshooting
- If CPU usage increases instead of the GPU, then re-do steps 1, 3 and 5
- If PixInsight crashes, re-do step 4
- If still not working, re-download all files and re-do every step
PixInsight re-installs and major updates will overwrite the tensorflow.dll, so step 1 must be re-done occasionally.